Hi all. I’ve been doing 2D CAD for a long time, started using 123D a few years ago. Still improving my printer.
I’ve downloaded a T-rex skull file (STL) that I’d like to print for my son. Rather than do a 10(+?) hour print, I’d like to break the model into smaller pieces and do multiple prints. After saving the file as a .123dx I tried modifying the model but couldn’t. Any suggestions welcome. Thanks.
If you don’t mind straight segment cuts, then Netfabb can do simple X,Y or Z plane cuts, using the original STL file, and separate the pieces in to individual .stl files. Cutting straight across a given plane, produces a flat surface that is easy to set on your build platform.
Gluing PLA - use “Harbor Freight - industrial strength super glue”
Gluing ABS - use “Testors - model cement”
Thanks Chris,
First I tried creating a plane and using; extrude, subtract. The model was ‘ignored’ by the subtract command. Same results for an STL file and for a 123dx file. Curious!?
Gene,
I have a copy of Meshmixer. Does it have a similar command as Netfabb?
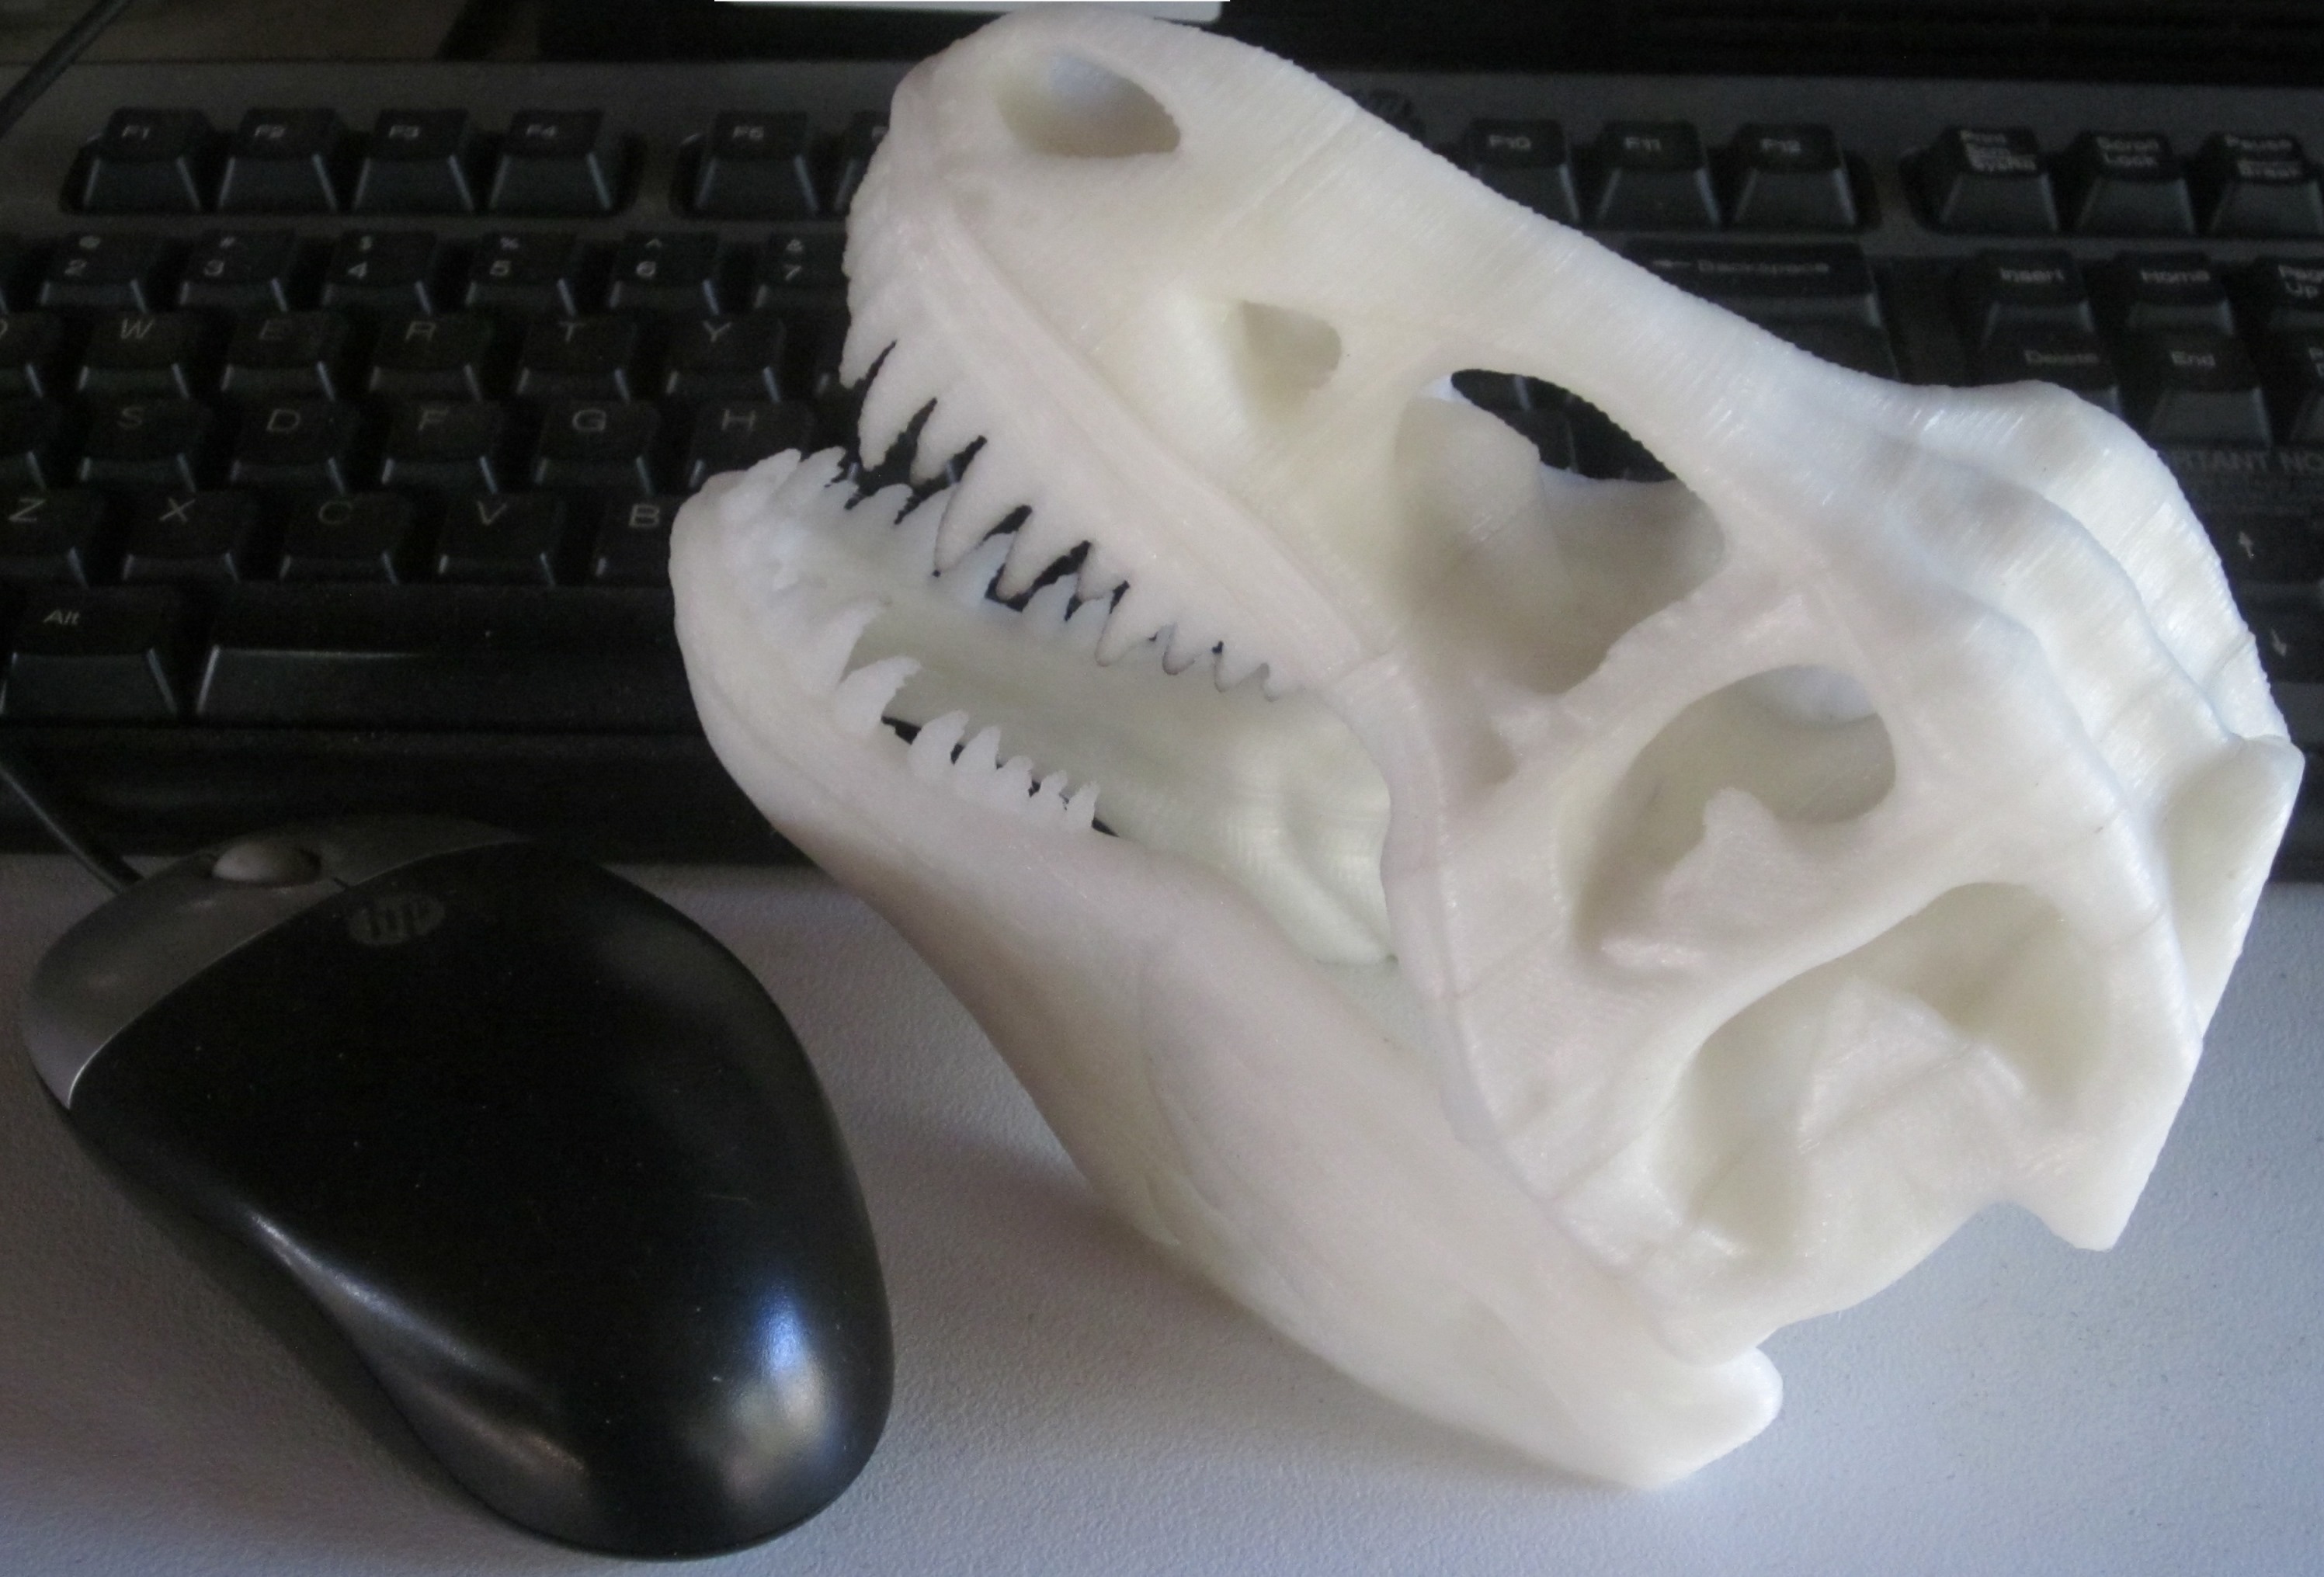
This was easier than I thought it would be. Meshmixer has a cut plane that you can position using ‘handles’. I cut the original model into numerous .stl files and printed the entire model as separate (average about 1hr each) prints. My son has been holding onto his new toy all afternoon
To make the sections, I opened the original file in meshmixer and immediately did a “save as” in case I wrecked it. I did successive plane cuts, saving each file in numbered sequence. The important part of the process is to undo each cut immediately after saving and reversing the direction of the cut. This method guarantees that all of the sections join at exactly the same plane.
The aim of doing it in sections was to minimise the use of support material. I used superglue ($2 per 7 tubes from the ‘cheap shop’) to fasten the sections together.
Comments/suggestions welcome.